
Sometimes, you just know something’s off long before you see an actual puddle on the floor. It might start with a nagging feeling when you open the water bill or a weird, musty smell you can’t quite place. Trust that gut feeling. Those little clues are often the first sign of a water leak, and catching them early can be the difference between a simple fix and a major renovation.
Your First Clues: Uncovering the Telltale Signs of a Water Leak
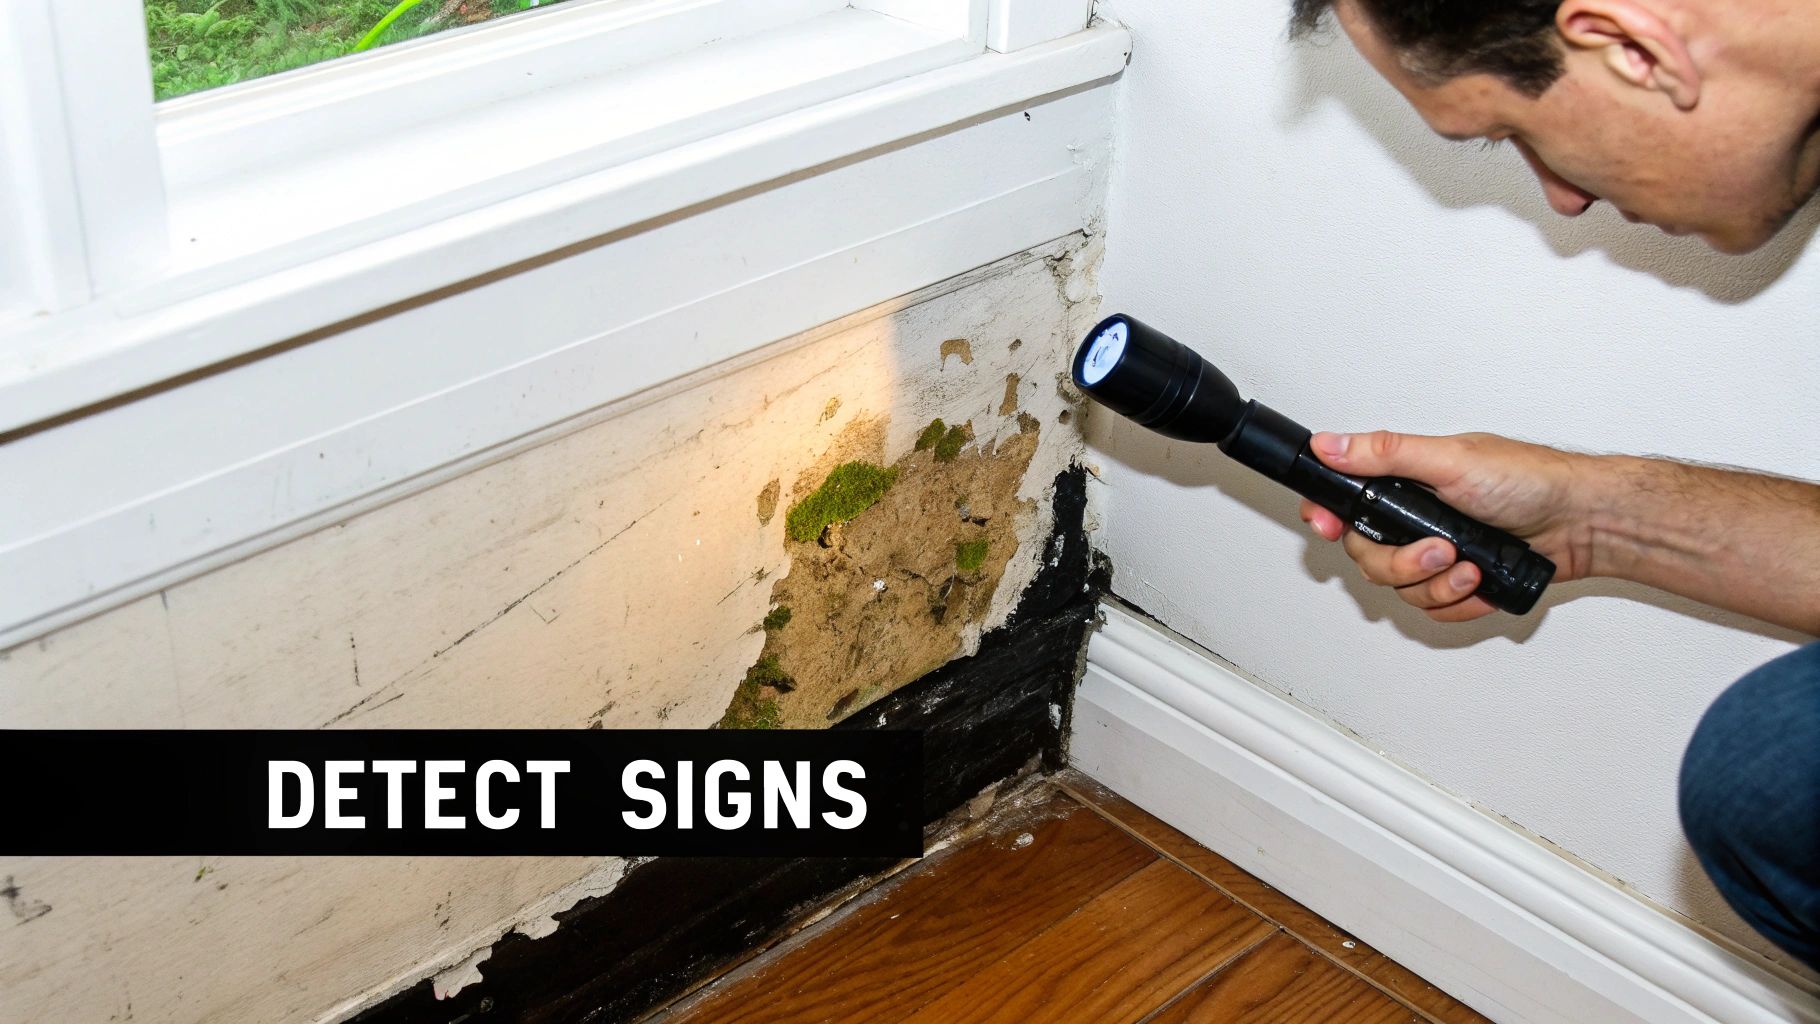
Before you start pulling up floorboards or poking holes in your drywall, your first job is to play detective. Many homeowners I’ve worked with in the eastern Dallas area tend to write off the earliest warning signs as just “the house settling” or some other quirk. But these subtle hints are your plumbing’s way of sending out an S.O.S.
This isn’t just a minor annoyance; it’s a huge issue for homeowners across the country. The market for water leakage detector systems ballooned to $1.8 billion in 2022—that tells you just how common this problem is. The stats are pretty startling: a small, undetected leak can waste around 10,000 gallons of water in a single household each year. That’s enough to spike your water bill by 10-20% and create the perfect environment for mold to take hold. You can discover more insights about this growing market and how it’s impacting homeowners.
Common Signs You Might Be Missing
The easiest signs to spot are often the ones we learn to ignore. Your own senses are your best tools for the initial investigation.
- Unexplained Sounds: Do you ever hear a faint hissing or dripping sound, even when every faucet is off? That’s a classic sign of a pipe leaking somewhere inside a wall or ceiling.
- Musty Odors: If you’ve got a persistent, earthy smell that just won’t air out—especially in a bathroom, laundry room, or under the kitchen sink—you’re likely smelling hidden moisture and mold.
- Visible Damage: Keep an eye out for peeling paint, wallpaper that’s starting to bubble, new stains on the ceiling, or warped baseboards. These are clear signs that water is getting somewhere it shouldn’t be.
- A Drop in Water Pressure: Does your shower feel weaker than it used to? If the flow from your faucets seems sluggish, it could point to a break somewhere in your main water line.
A Rockwall homeowner called us recently because their water bill had shot up by $50 for no apparent reason. They searched everywhere for a drip but found nothing. When we walked the yard, we spotted a small, unusually green patch of grass. Turns out, it was an underground irrigation leak they never would have noticed otherwise.
Quick Guide to Common Leak Symptoms
Sometimes it’s hard to know what you’re even looking for. To help you connect the dots, here’s a quick table matching common symptoms to their likely culprits.
| Symptom | Possible Leak Source | Urgency Level |
|---|---|---|
| Sound of running water when idle | Toilet flapper, main service line, slab leak | High |
| Damp, warm spots on the floor | Hot water line slab leak | High |
| Musty smell under a sink | Drain pipe or P-trap leak | Medium |
| Unusually lush patch in the yard | Irrigation line or main service line | Medium |
| Peeling paint near a shower | Leaky shower fixture or grout | Low |
This table should give you a solid starting point for your investigation. Knowing what to look for helps narrow down the search and tells you how quickly you need to act.
Using Your Water Meter for a Definitive Leak Test
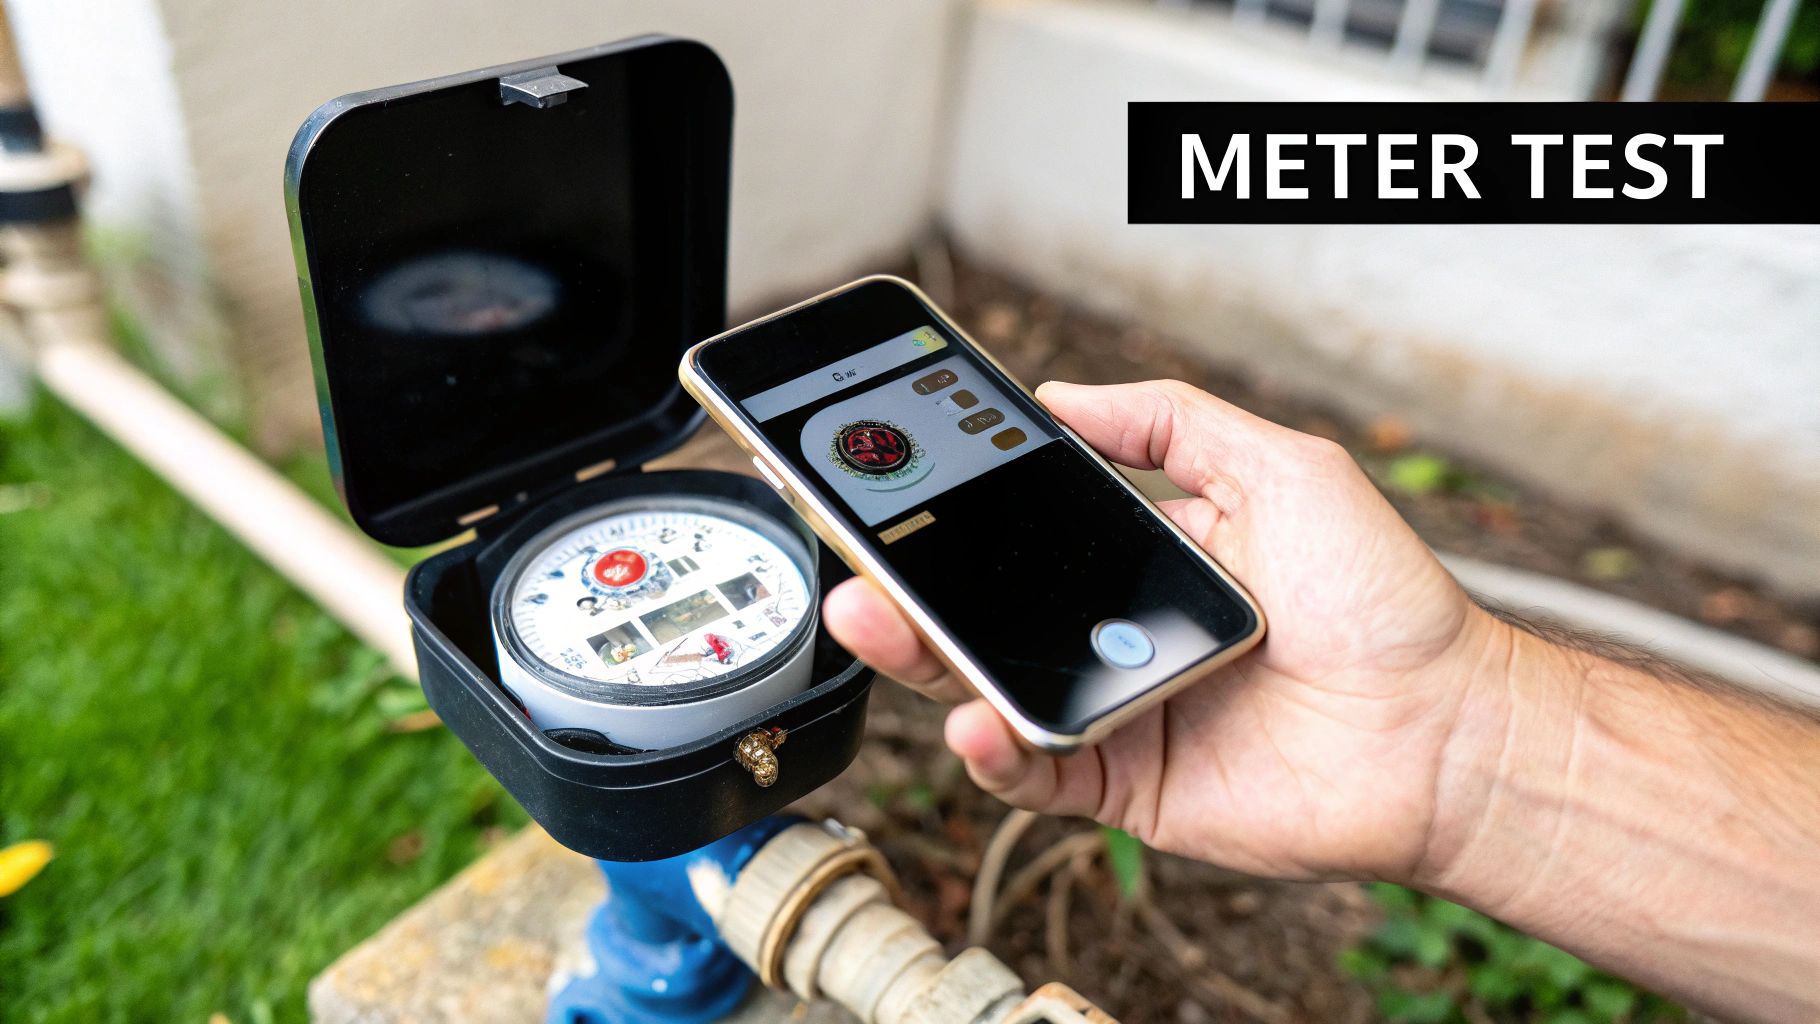
So, you’ve noticed the signs and suspect you have a leak. Your next move is to get concrete proof, and your home’s water meter is the single most reliable tool for the job. Think of it as your home’s main water accountant—it tracks every single gallon used, and it can’t be fooled by hidden drips.
Performing a meter test is surprisingly simple and gives you a definitive answer to the question, “Do I have a leak?” This quick diagnostic can save you from weeks of head-scratching and watching your water bills climb.
First, Find Your Water Meter
Before you can run a test, you have to find the meter itself. Around the eastern Dallas area, their locations can vary quite a bit depending on the age and style of your home.
Here’s where to look first:
- At the Curb: The most common spot is near the street at the front of your property. It’s usually housed in a concrete or plastic box set into the ground. You might need a screwdriver or a specific meter key to lift the heavy lid.
- Basement or Crawl Space: In some older homes, particularly in established neighborhoods like Garland or Mesquite, the meter might be located inside where the main water line enters the house.
- Utility Closet: For condos, townhomes, or apartments, check for a dedicated utility closet on an exterior wall.
Once you’ve found it, clear away any dirt, grass, or debris covering the face so you can get a clear view of the dial or digital display.
How to Read Your Meter and Run the Test
With the meter exposed, the test itself is pretty straightforward. The first thing you need to do is make sure every single water-using appliance in and around your home is turned off. No flushing toilets, running dishwashers, or active sprinkler systems. Everything off.
Now, take a close look at the meter. What you’re looking for depends on the type you have:
- Analog Meters: These older meters have a sweep hand and a small triangle or star-shaped dial, known as the leak indicator. If that little indicator is spinning, even slowly, you have an active leak.
- Digital Meters: These are becoming more common. They might show a flow rate or have a flashing faucet icon to indicate that water is actively moving through the system. Any numbers ticking upward when all water is off is a dead giveaway.
Pro Tip: This little trick makes it foolproof. Take a clear picture of the meter with your phone at the start. Wait 30 to 60 minutes without using any water, then take another photo. Comparing the two pictures side-by-side makes it easy to spot even the tiniest movement.
What the Results Mean
If the leak indicator moved or the digital numbers changed, congratulations—you’ve officially confirmed a leak somewhere on your property. This is a crucial step because it moves you past the guesswork stage.
This simple test empowers you to take the next step with confidence. We recently helped a Rockwall homeowner who noticed their bill was creeping up. They performed this exact test and saw the small triangle dial moving just slightly. That tiny movement was a slow, hidden leak silently adding over $50 to their monthly bill.
Confirming the leak with your meter gives you the green light to move on to the next phase: a hands-on inspection of your home’s fixtures and appliances to pinpoint the source.
Inspecting Fixtures And Appliances For Obvious Leaks
So, the water meter test confirmed your suspicion—you’ve definitely got a leak somewhere. Before your mind jumps to pipes hidden in the walls or under the foundation, let’s start with the most common culprits. The good news is that a huge number of household leaks are right out in the open, coming from everyday fixtures and appliances.
We’re going to walk through the high-traffic areas first. A systematic, hands-on check of your toilets, faucets, and water-using appliances can often solve the mystery quickly. Think of it as ruling out the easy stuff before we start the serious detective work.
The Number One Suspect: Toilets
If I had to bet on the source of a high water bill, my money would almost always be on the toilet. A running or leaking toilet is hands-down the most common leak we find in Dallas-area homes. The sneakiest part is that they’re often completely silent, letting thousands of gallons drain away every month without you ever noticing.
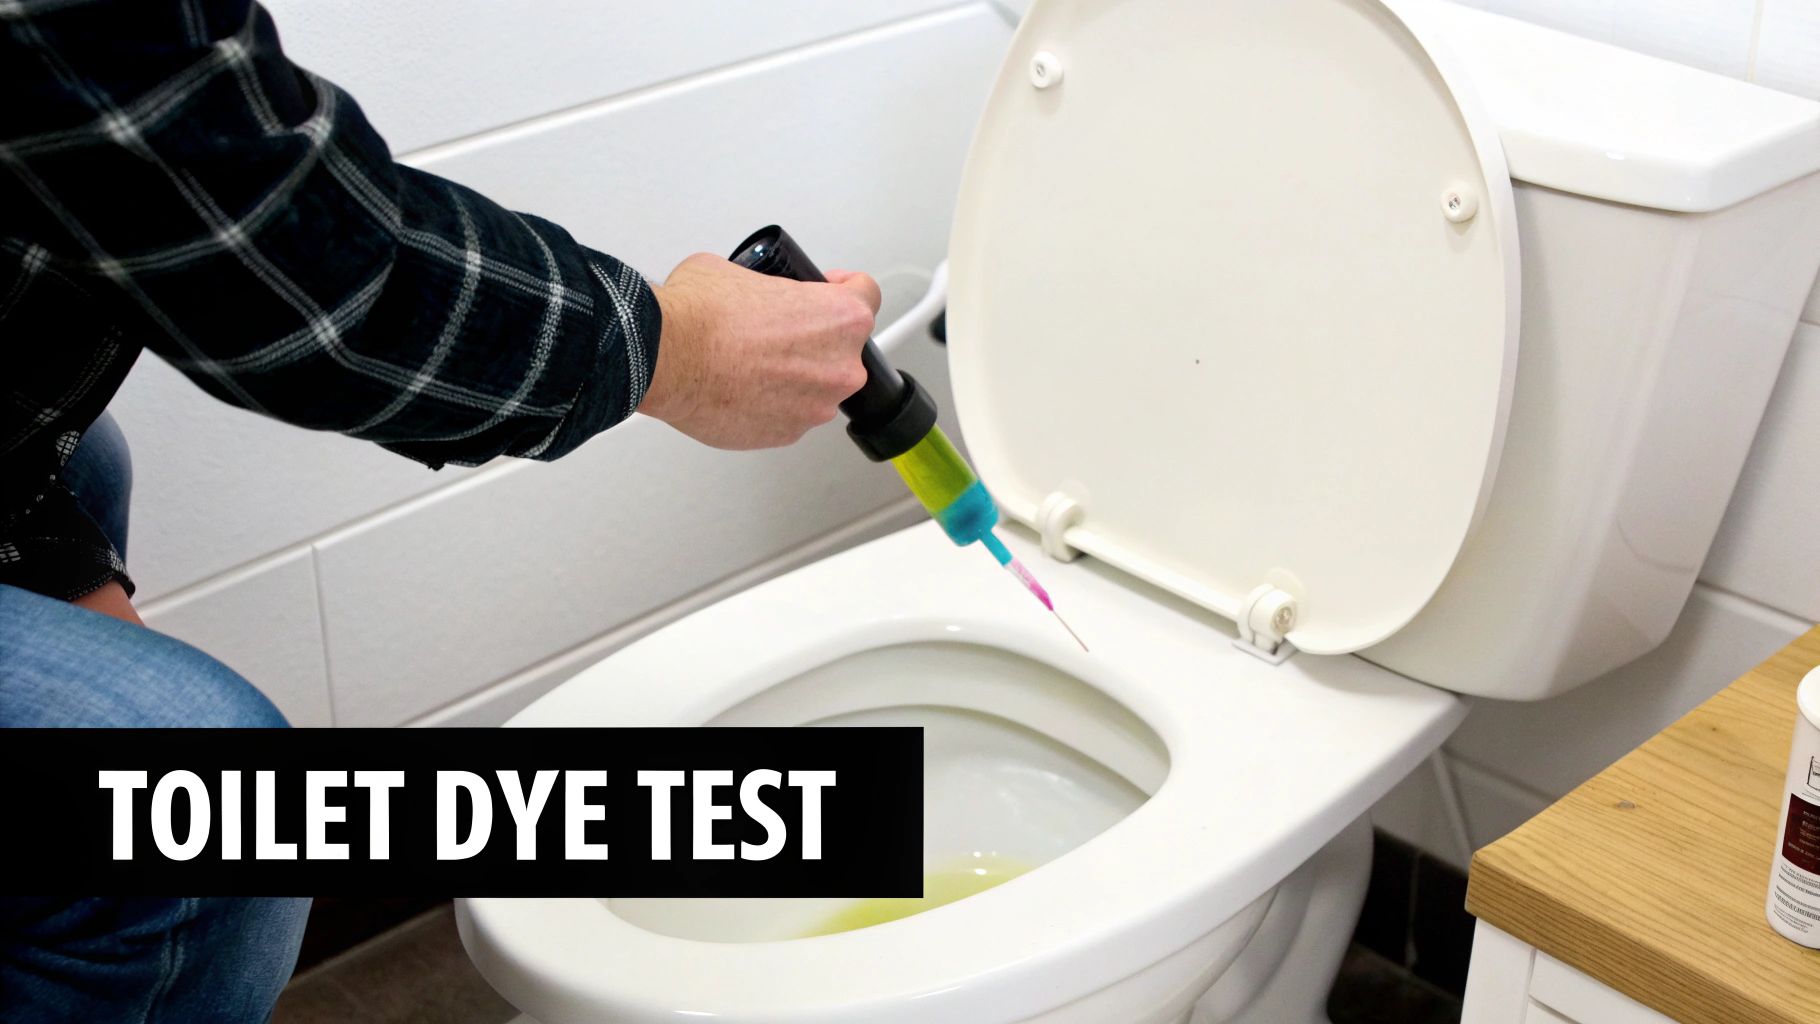
The problem is usually a worn-out or poorly seated flapper, which is that simple rubber seal at the bottom of the tank. To find out for sure, your best friend is the toilet dye test. It’s incredibly simple and crazy effective.
Here’s how you do it:
- Pop the Tank Lid: Carefully lift the porcelain lid off the toilet tank and set it somewhere safe.
- Add Some Color: Drop in a few drops of food coloring or a special dye tablet. You just need enough to give the tank water a distinct color.
- Wait it Out: This is the important part—don’t flush! Just let it sit for 15-20 minutes.
- Check the Bowl: Take a look inside the toilet bowl. If you see even a hint of that color, you’ve found your leak. It means water is seeping from the tank into the bowl, and it’s almost always a sign that the flapper needs replacing.
One more pro tip: check around the base of the toilet. Wipe a dry paper towel around the bolts and where the toilet meets the floor. Any dampness or discoloration on the flooring points to a failing wax ring seal—a much more serious issue that needs to be addressed right away to prevent floor damage.
Faucets And Showerheads
That steady drip… drip… drip… is more than just annoying background noise. It’s a constant drain on your wallet. Even a slow drip can waste a shocking amount of water over the course of a year, so it’s time to check every single one.
Go through your house and check every faucet—sinks, tubs, showers, even the outdoor spigots. Turn them on, then shut them off tightly. Watch closely for any drips that continue after the water is off. While you’re there, feel around the base of the faucet and the handles for any small puddles. Most of the time, the fix is a simple, inexpensive DIY job involving a worn-out washer or O-ring.
Here’s a subtle sign people often miss. After you turn a faucet off, wipe the aerator (the little screen on the spout) completely dry with a paper towel. Come back in a few minutes. If it’s wet again, you have a very slow, sneaky drip.
To help you stay organized, here’s a quick checklist for a methodical inspection of your home’s most common fixtures.
Systematic Checklist for Inspecting Common Fixtures
| Fixture/Appliance | Key Inspection Points | Tools Needed |
|---|---|---|
| Toilets | Check for colored water in the bowl after a dye test. Listen for hissing. Check for moisture around the base. | Food Coloring/Dye Tablets, Paper Towels |
| Sink Faucets | Look for drips from the spout. Check for water pooling around the base and handles. Feel underneath for moisture. | Flashlight, Paper Towels |
| Showerheads/Tubs | Watch for drips from the showerhead or tub spout after turning off. Check for leaks around the valve handles. | Flashlight |
| Washing Machine | Inspect hot & cold supply hoses for cracks, bulges, or brittleness. Check connections for drips. | Flashlight |
| Dishwasher | Look for dampness on the floor in front of the unit. Check the supply line under the sink for leaks. | Flashlight, Paper Towels |
| Refrigerator | Examine the ice maker/water dispenser supply line for kinks, cracks, or drips at the connection point. | Flashlight |
| Water Heater | Look for water pooling on the floor. Check all pipe connections. Inspect the T&P relief valve for drips. | Flashlight |
Following a list like this ensures you don’t miss anything obvious. It’s the fastest way to either find your leak or confidently move on to the next phase of your search.
Investigating Water Heaters And Appliances
Your water heater, washing machine, and dishwasher are all directly plumbed into your home’s water supply, making them prime suspects for leaks. Leaks from these sources can cause significant damage quickly, so a careful inspection is a must.
Start with the water heater. Scan the floor all around the unit for any signs of moisture or rust stains. Carefully check all the connections, both at the top and bottom of the tank. Pay close attention to the temperature and pressure (T&P) relief valve—it’s usually on the side with a pipe running down toward the floor. If that valve is dripping, it could signal excessive pressure in the tank and needs a professional plumber to take a look.
Next, move on to your other major appliances:
- Washing Machine: Gently pull the machine away from the wall so you can get a good look at the hot and cold supply hoses. These rubber hoses get brittle over time and are notorious for cracking.
- Dishwasher: The leak will likely show up under the kitchen sink where the supply line connects. Check for any dampness or water stains in the cabinet.
- Refrigerator: If you have an ice maker, inspect the small plastic water line running to the back of the fridge. Make sure it isn’t kinked, cracked, or dripping.
By systematically checking these common offenders, you’ll either find the source of your leak or rule them out with confidence. If you’ve checked them all and found nothing, it’s time to start searching for a more hidden problem.
Finding Hidden Leaks in Walls and Under Floors
So, you’ve checked all the usual suspects—toilets, faucets, appliances—but your water meter test is still screaming “leak.” This is when things get a bit more serious. It’s time to start looking for the leaks you can’t see, the ones hiding inside your walls, ceilings, or under the floorboards.
These are often the most destructive types of leaks because they can go unnoticed for weeks or even months. Finding them is less about simple checks and more about becoming a detective in your own home, hunting for subtle clues.
Using Your Senses as Diagnostic Tools
Before you grab any tools, just use your eyes, ears, and sense of touch. Take a slow walk through your house, paying extra attention to areas around bathrooms, the kitchen, and your laundry room, where most of your plumbing is concentrated.
Here are the key signs to watch for:
- What to Look For: Keep an eye out for any discoloration or dark, spreading stains on ceilings or drywall. Look for paint that’s bubbling, peeling, or cracking. Warped or swollen baseboards are another dead giveaway.
- What to Listen For: When the house is quiet, listen closely. Do you hear a faint dripping, hissing, or the sound of running water coming from inside a wall? That’s often the most direct clue you’ll get.
- What to Feel For: Gently press on drywall in areas you’re suspicious of. If it feels soft, spongy, or gives way easily, moisture has already compromised the material. Also, place your hand on the surface—a spot that feels unusually cold or damp is a major red flag.
These simple sensory checks are your first line of defense. If you’ve narrowed it down to a specific area, you can bring in a tool to confirm your suspicions.
Confirming Moisture with a Meter
A moisture meter is an affordable tool that every homeowner should consider having. It’s a fantastic way to confirm the presence of water inside a wall without having to cut a hole in it. The device has two small prongs you just press against the drywall, wood, or flooring.
A normal, dry wall will give you a very low moisture reading. But if you test a suspicious spot and the reading suddenly spikes, you’ve found your damp zone. Test multiple spots in a grid pattern to map out the extent of the moisture, which helps you zero in on the leak’s source.
Don’t just test the stained area. Check several feet around it in all directions. Water can travel along studs and joists, so the wettest spot might not be directly below the actual pipe leak.
The Professional’s Secret Weapon: Thermal Imaging
While a moisture meter is great for confirming a problem, professionals often use more advanced tech to “see” behind walls without causing any damage. A thermal imaging camera detects tiny temperature differences on a surface. Because of evaporation, wet areas are almost always cooler than the surrounding dry areas.
This technology is a game-changer. Hidden water leaks are a global issue, fueling a water leak detection market valued at a staggering $4.69 billion. With thermal cameras, pros can spot the telltale temperature drops and successfully identify hidden leaks in up to 85% of cases that would otherwise be completely invisible. You can discover more insights about these advanced detection systems and their impact.
This is where the line between a DIY job and calling for professional help often gets drawn. If you know there’s moisture but can’t find the source, bringing in an expert with this equipment can save you from the costly, messy process of cutting open your walls just to look around. We have more tips on how to find hidden plumbing leaks using both simple and advanced methods.
Diagnosing Slab Leaks and Outdoor Plumbing Issues
When you’ve checked every faucet, toilet, and appliance inside and still can’t find the source of a high water bill, it’s time to shift your search to more challenging territory. This is where we get into slab leaks and underground pipe problems—issues that are often the most intimidating a homeowner can face.
We’re not talking about minor drips here. These leaks can seriously compromise your home’s foundation and send your water bills through the roof.
A slab leak is exactly what it sounds like: a leak in a water line that runs beneath your home’s concrete foundation. Since the pipes are buried, you can’t just look for a puddle. Instead, you have to become a detective and listen to the subtle—but very telling—signs that point to trouble right under your feet.
Uncovering the Signs of a Slab Leak
The clues for a slab leak are unique, and you have to pay close attention to your home’s environment to catch them. If you notice any of the following, it’s time to dig a little deeper.
- Unexplained Warm Spots on the Floor: This is a classic. If a hot water line is leaking under the slab, that heat will radiate up through the concrete. Walking barefoot and finding a random warm patch on your tile or wood floor is a dead giveaway.
- The Sound of Running Water: When the house is quiet and every faucet is off, listen closely. If you hear a faint hissing or running water sound that seems to be coming from nowhere in particular, it could be a pipe leaking directly below you.
- Spikes in Your Water Bill: Often the very first red flag, a sudden and dramatic increase in your water bill that makes no sense is your wallet’s way of telling you there’s a serious underground leak.
- Foundation Cracks or Shifting: A leak that goes on for too long will saturate and erode the soil supporting your foundation. This can eventually lead to visible cracks in your floors or walls as the foundation begins to shift.
Slab leaks are serious business. Because they are hidden and directly impact your home’s structural integrity, this is not a DIY repair. The moment you suspect a slab leak, your next call should be to a professional leak detection specialist.
Checking for Leaks in Your Yard
Your investigation doesn’t end at the foundation. The plumbing lines running from the water meter to your house, as well as the lines for your irrigation system, are also common culprits for hidden leaks. These outdoor problems show themselves in different ways.
A leaky irrigation line is a frequent offender. Take a walk around your property. Are there specific patches of your lawn that are suspiciously green and lush compared to everything else? You might also find soggy, perpetually damp spots or even small sinkholes where the leaking water has washed away the soil underneath.
Performing a Pressure Gauge Test
For the main water line connecting the meter to your house, one of the most effective diagnostic tools you can use yourself is a simple pressure gauge. This test will tell you if your main line is holding steady pressure or if it’s losing water somewhere between the street and your home.
You can pick up an inexpensive pressure gauge that screws right onto an outdoor faucet. Once it’s on tight, turn the faucet on all the way. Take note of the initial PSI reading, which is usually between 40-80 for most homes. Then, go shut off the main water valve to your house.
If the pressure drops by more than 10 PSI over the next 15-20 minutes, that’s a strong indicator you have a leak in that line. This one technique successfully identifies around 60% of main line problems, according to industry data. For complex issues like these, advanced professional services like hydro jetting and sewer camera inspections are often required to find and fix the problem without major excavation. You can discover more about water leak detection technology and its effectiveness.
Using a professional plumbing camera inspection is the definitive way to get eyes inside those underground pipes, saving time and preventing crews from digging up your yard unnecessarily.
Knowing When to Call a Leak Detection Specialist
You’ve done the detective work, checked all the usual suspects, and maybe even busted out a moisture meter to trace that stubborn damp spot. While the DIY spirit is something we admire, there’s a point where persistence can cause more damage than it solves. Knowing when to put down the tools and pick up the phone is a critical part of protecting your home from serious, costly harm.
Some situations are clear signals that the problem has graduated beyond a simple fix. If you’ve run the meter test and that dial is spinning like crazy but you can’t find a single visible drip, you’re likely dealing with a significant break in a hidden line. Same goes for any definitive signs of a slab leak—things like warm spots on the floor or new cracks in your foundation are immediate red flags.
The Professional Advantage
Calling a licensed plumbing company isn’t admitting defeat; it’s making a smart, strategic decision to protect your biggest investment. We bring advanced diagnostic tools to the table that a homeowner simply doesn’t have in their garage, ensuring we find the problem accurately and with minimal disruption.
Specialists use some pretty impressive gear to pinpoint leaks:
- Acoustic Listening Devices: This equipment lets us “hear” the distinct sound of pressurized water escaping from a pipe, even if it’s buried deep underground or behind a thick wall.
- Thermal Imaging Cameras: As mentioned earlier, these cameras are fantastic for spotting the subtle temperature differences caused by hidden moisture, creating a visual map of the leak.
- Pipe Inspection Cameras: For stubborn sewer or main line issues, we can send a small, high-resolution camera directly into the pipe to get a real-time view of the break or blockage.
A homeowner was floored when her water bill suddenly shot up to over $800. She tried the dye test in her toilets but found nothing. A specialist quickly located a severe, silent leak inside her toilet’s tank mechanism that was missed, preventing thousands more gallons from being wasted and saving her floor from potential water damage.
Preparing for the Plumber’s Visit
Once you’ve made the call, a few simple steps can make the visit much more efficient. Try to clear the area where you suspect the leak is, whether it’s under a packed sink cabinet or in a cluttered utility closet.
It’s also helpful to jot down a list of all the signs you’ve observed, including any weird sounds, musty smells, or the timeline of when you first noticed the issue. The more information you can give us, the faster we can get to the root of the problem. For more on what to expect, check out our guide on professional leak detection and repair.
Common Questions We Hear About Finding Water Leaks
When you suspect a water leak, a lot of questions probably pop into your head. It’s completely normal. To help you get some clarity and move forward with confidence, we’ve put together answers to the questions we hear most often from homeowners right here in the eastern Dallas area.
How Much Does a Hidden Water Leak Really Cost?
It’s easy to focus on the water bill, and yes, that’s a big part of it. A single, stubborn leak can easily waste thousands of gallons a year, tacking on an extra $50 to $100 or more to your monthly bills. That alone is frustrating enough.
But honestly, the bigger financial hit usually comes from the collateral damage. Water that seeps into your home’s structure is a silent destroyer. We’re talking about thousands of dollars in repairs for rotted wood, drywall that’s turned to mush, ruined flooring, and even professional mold remediation. A small leak that’s ignored for a few months can quickly spiral into a repair bill that makes the initial plumbing fix look tiny.
Can a Small Leak Cause Major Problems?
Absolutely, and this is a point I can’t stress enough. It’s a common myth that a tiny drip is no big deal. The truth is, that slow, steady leak is one of the most destructive forces in a home, quietly undermining its integrity day after day.
Think of it this way: one drop of water is nothing. But over months, all those drops saturate the wood in your walls, cause drywall to crumble, and create the perfect dark, damp playground for mold to grow. That tiny leak is often the starting point for some of the most extensive and expensive home repairs we see.
How Accurate Are DIY Methods vs. Professional Tools?
This is a great question. DIY methods, like the water meter test or putting food coloring in your toilet tank, are fantastic for one thing: confirming you have a leak. They are your essential first line of defense and something every homeowner should know how to do. They’re incredibly accurate for figuring out if there’s a problem and sometimes catching an obvious culprit.
Where the professional tools come in is for pinpointing the exact location of hidden leaks. You might be able to confirm there’s moisture in a wall with a basic moisture meter, but a professional with an acoustic listening device or a thermal camera can find the precise spot where a pipe has failed. That level of accuracy is what prevents a messy, expensive, and destructive “search and destroy” mission of tearing open walls and floors just to find the source.
What Maintenance Can I Do to Prevent Future Leaks?
Being proactive is your best defense against the headache of an unexpected leak. A few simple habits can make a world of difference. Here’s what I always recommend to our clients:
- Check Your Supply Hoses: Every few months, take a peek at the hoses connected to your washing machine, dishwasher, and ice maker. If you see any bulging, cracking, or signs of brittleness, replace them.
- Know Your Main Shut-Off Valve: Everyone in the house should know where the main water shut-off is and how to use it. Test it once a year to make sure it isn’t seized up. You’ll be glad you did in an emergency.
- Keep an Eye on Water Pressure: High water pressure puts a ton of stress on your entire plumbing system. If your home’s pressure is consistently above 80 PSI, it’s worth looking into a pressure regulator.
- Fix Drips Immediately: That little drip is more than an annoyance; it’s a warning sign. It means a seal or component is failing, and it will only get worse. Tackling it early is always the cheaper and easier option.
